Table of Contents
- What Office Furniture Warehouse Installation Services Actually Do
- Commercial Furniture Assembly Cost: What Shapes Your Quote
- The Furniture Installation Project Timeline, Step by Step
- Your Office Furniture Installation Checklist: How to Prepare
- DIY vs. Professional Installation: A Cost-Benefit Analysis
- Ergonomic Setup Standards and Sustainability After Installation
- Conclusion: Start Your Office Furniture Project Right
- Frequently Asked Questions
Last Updated: September 4, 2026
Finding reliable office furniture installation services near me often feels like the last hurdle after weeks of furniture shopping. You have the desks, chairs, and cubicles, but a pile of boxes on the loading dock doesn’t create a workspace. Professional installation turns that inventory into a functioning office, and knowing how that process works protects your investment.
At Office Furniture Warehouse, we have spent over 35 years fitting businesses of every size. We have seen what happens when installation is treated as an afterthought: damaged panels, mismatched hardware, and teams working around half-assembled workstations. This guide explains what professional installers actually do, how project timelines unfold, and where you can safely save money without compromising quality.
Most guides jump straight to pricing. We will cover costs, but first, we need to clarify what you are actually paying for. The scope of work in commercial furniture installation goes far beyond turning a screwdriver.
What Office Furniture Warehouse Installation Services Actually Do
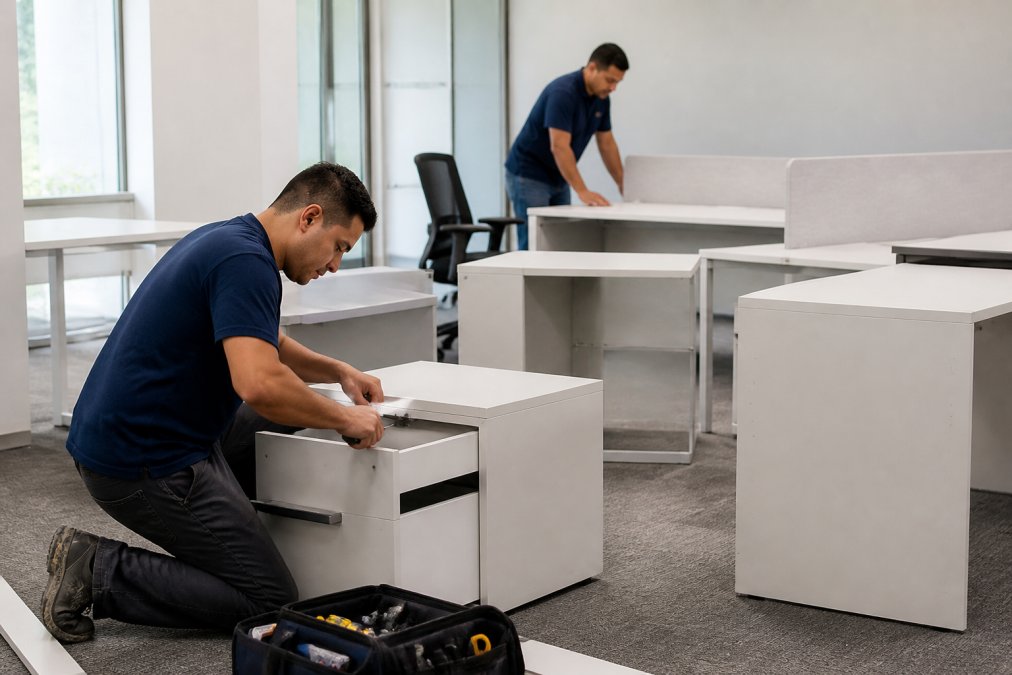
Office furniture installation is the professional process of assembling, placing, and securing commercial furniture according to a planned office layout. It involves much more than basic assembly; it covers modular systems, panel systems, and fixed seating that require specialized tools and training.
Professional installers handle several distinct tasks that most people overlook:
- Modular systems assembly: Connecting panel systems, work surfaces, and overhead storage into seamless workstations
- Cubicle installation: Aligning panels, mounting tiles, and running furniture-level power and data cabling
- Furniture reconfiguration: Dismantling and reconfiguring existing workstations to fit a new space plan
- Fixed seating and ergonomic installation: Securing chairs and monitor arms to manufacturer torque specifications
A reliable crew also handles furniture logistics and site logistics. They schedule delivery windows, inspect each piece for shipping damage, and manage the flow of materials from the dock to the final position. What most guides miss is that a good installer protects the furniture before assembly begins. They check the site for adequate clearance, level floors, and proper lighting, preventing costly mistakes during the setup phase.
Commercial Furniture Assembly Cost: What Shapes Your Quote
Commercial furniture assembly cost is not a fixed number, and any provider quoting a flat rate without a site visit is guessing. Pricing typically depends on the complexity of the furniture, the quantity of units, and how many technicians the project requires.
Several factors drive the final quote:
Furniture type and brand. Contract furniture from premium manufacturers often uses proprietary hardware and connectors. A technician familiar with those specific brands works faster and avoids costly mistakes. Generic labor rates do not account for this expertise.
Project scope. Installing 15 identical workstations is more efficient per unit than installing 15 different pieces. A standardized layout reduces labor hours, while a highly customized space plan with angled panels and varied heights increases them.
Access and conditions. A ground-floor office with a loading dock is cheaper to service than a fourth-floor walk-up. Elevator reservations, hallway protection, and debris removal all factor into the final number.
The U.S. Bureau of Labor Statistics occupational data tracks wages for furniture installers, but actual project quotes vary widely by region and demand. A transparent provider will break down labor, materials, and any additional fees before work begins. Ask for a written scope that lists the number of technicians, estimated hours, and what happens if the project runs longer than expected.
What a Realistic Quote Looks Like: A Cost-Benefit Breakdown
Most service pages stop at listing factors. To make an informed decision, you need a ballpark of what those factors translate to in dollars. While exact quotes require a site visit, here is a grounded range based on common industry patterns for commercial projects in the United States:
- Per-workstation labor: For a standard 8×8 cubicle or modular workstation (panels, work surface, overhead bin, and basic power), pricing depends on quantity, dates, and delivery. Highly customized or heavy systems furniture (e.g., full-height walls, glass panels, or integrated power/data modules) can also affect the cost.
- Per-desk labor: A simple freestanding desk (frame, top, and legs) will have pricing that depends on quantity, dates, and delivery. A height-adjustable desk with a crank or motor adds complexity, so pricing will reflect that.
- Per-chair assembly: Basic task chairs will have pricing that depends on quantity, dates, and delivery. Ergonomic chairs with advanced mechanisms or those requiring torque-specified fasteners will also have pricing that depends on quantity, dates, and delivery.
- Hourly rates for small jobs: If you have fewer than five pieces, many installers charge an hourly rate, with a minimum of two to four hours. This covers travel, setup, and the fixed cost of dispatching a crew.
- Project management fee: For larger installations (over 50 workstations), a project manager fee is common. This covers site coordination, delivery scheduling, and the final walkthrough.
- Travel and access surcharges: Expect a trip charge for locations beyond a standard service radius. If the site requires after-hours work (evenings or weekends), labor rates often increase.
These figures are planning benchmarks, not quotes. The only way to get a firm number is a site visit. A provider that refuses a site survey and quotes over the phone is likely to add surprise charges later.
DIY vs. Professional: The Real Cost Comparison
A common mistake is comparing the installer’s labor quote against the cost of your own team’s time at zero dollars. That comparison ignores the hidden costs of DIY installation:
- Time cost: A two-person team assembling 15 modular workstations will spend 3-4 full days on the task. At a blended loaded cost of $40/hour per employee (wages plus benefits), that is roughly $1,920-$2,560 in internal labor, often more than the professional quote.
- Tool cost: Professional crews bring specialized tools (e.g., torque drivers, panel lifts, and alignment jigs). Your team likely lacks these, and renting them adds $100-$300 per day.
- Damage and rework risk: A single damaged panel or over-torqued connector can cost $200-$800 to replace, plus the delay of ordering a replacement. Professional installers carry liability insurance to cover these mistakes.
- Warranty protection: Many manufacturers require professional installation to keep the warranty valid. DIY assembly can void coverage on high-end systems furniture.
How to Get an Accurate Quote in Three Steps
- Request a site survey. A reputable installer will walk your space, check floor flatness, measure doorways and elevators, and confirm the layout plan before quoting.
- Ask for a line-item breakdown. The quote should list the number of technicians, estimated hours per task, labor rate, and any separate fees for travel, disposal, or project management.
- Clarify the change-order policy. Ask what happens if the project scope changes mid-installation or if the furniture arrives damaged. A written policy protects you from surprise bills.
A provider that offers a flat per-unit price without a site visit is not giving you a real quote, they are giving you a guess that will be adjusted later. Insist on a survey, and you will avoid the most common source of installation budget overruns.
The Furniture Installation Project Timeline, Step by Step
A standard furniture installation project timeline runs from one to five days for a typical office floor, depending on the number of workstations and the complexity of the layout. A single technician can assemble a basic desk in about an hour, but a full modular workstation with overheads and panels takes three to four hours per unit.
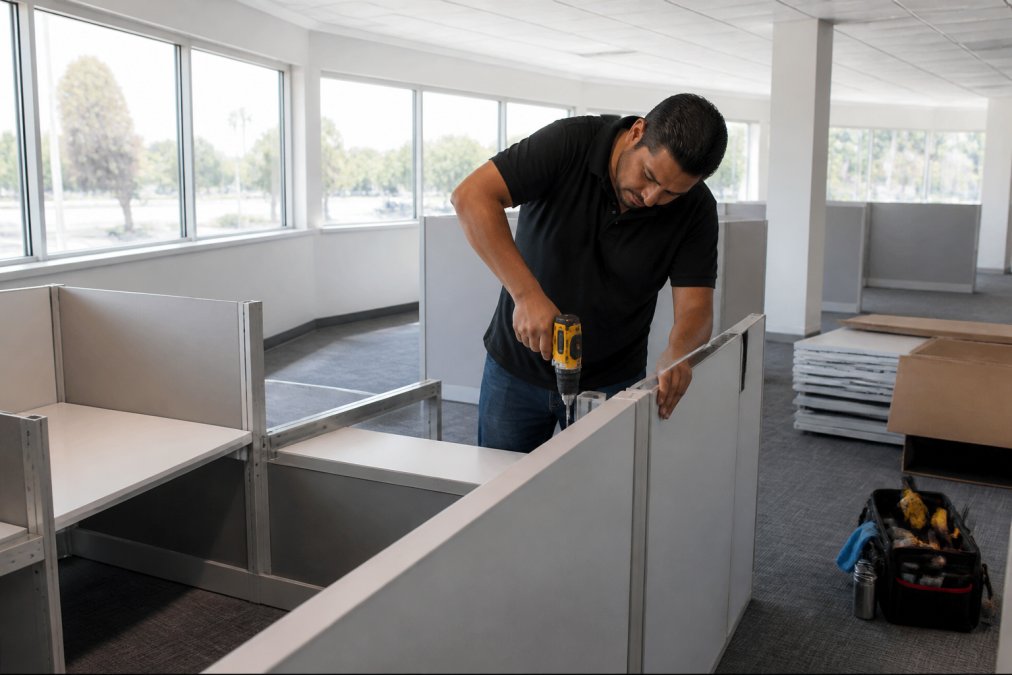
Here is what a realistic sequence looks like:
- Site inspection and delivery coordination: The installation crew confirms the delivery date, checks the loading dock, and maps the path from dock to final position. This step takes half a day.
- Receiving and inventory check: Every carton is counted and cross-checked against the packing list. Damaged items are documented immediately. Allow two to four hours for a full truckload.
- Assembly and placement: Technicians build each workstation on site and move it into position. This is the bulk of the project and consumes most of the timeline.
- Cabling and finishing: Furniture-level power is connected, grommets are fitted, and all surfaces are wiped down. A final walkthrough with the project manager confirms every piece meets the layout plan.
A common mistake is scheduling installation and the office move on the same day. The installation must finish before computers, files, and personal items arrive. Build a buffer day into your plan; it saves stress when a shipment runs late or a panel arrives damaged.
Your Office Furniture Installation Checklist: How to Prepare
Preparing your site before the crew arrives cuts installation time and reduces the risk of damage. This office furniture installation checklist covers the essentials that facility managers and business owners often forget.
One week before installation:
- Clear the installation area completely. Remove old furniture, rugs, and obstacles that block pathways.
- Confirm the layout plan with your project manager and have printed copies available on site.
- Verify elevator access, reserve the freight elevator if required, and protect floors and walls along the delivery path.
The day before installation:
- Ensure the space is clean, well-lit, and climate-controlled. Extreme temperatures can warp wood veneers and affect adhesives.
- Designate a contact person who can make decisions on site. The crew should never have to guess about layout changes.
The day of installation:
- Walk the space with the lead installer before they start. Confirm the layout and flag any concerns.
- Keep the packing list and purchase order accessible for the inventory check.
- Plan for waste removal. Ask whether the crew handles carton disposal or if you need to arrange recycling.
Sustainability matters here too. Instead of sending cardboard and plastic wrap to a landfill, ask your installer about recycling options. Many facilities now require contractors to separate recyclable materials, and a professional crew will accommodate that request.
The Pre-Installation Site Readiness Audit: What Most Checklists Miss
Most checklists stop at clearing the floor and confirming the layout. But the difference between a smooth installation and a delayed one often comes down to site conditions that are invisible until the crew arrives. Use this audit to catch them before they become problems.
Floor flatness and levelness. Modular systems furniture relies on level panels and work surfaces. A floor that slopes by more than 1/8 inch over 10 feet can cause panels to rack and drawers to bind. Use a 4-foot level to check the installation area. If you find significant slopes, flag them to the installer, they may need shims or leveling feet, which adds time to the project.
Power and data outlet locations. Furniture-level power (e.g., a power pole or an in-panel electrical system) must connect to a building outlet. Confirm that outlets are within reach of the planned furniture footprint. If the layout places a workstation 15 feet from the nearest outlet, the installer cannot simply extend the cord, you will need an electrician to add a floor box or relocate the outlet. This is a common cause of mid-project delays.
Ceiling height and overhead obstructions. Panel systems often rise to 48, 60, or 80 inches. If you are installing panels with overhead storage, confirm the ceiling height and check for sprinkler heads, light fixtures, or HVAC diffusers that might interfere. A panel that hits a sprinkler head is a code violation and a safety hazard.
Doorway and corridor clearances. Measure the width of every doorway, hallway, and elevator opening along the path from the loading dock to the final position. A standard 36-inch doorway fits most panels, but a 30-inch door may require disassembling panels that were meant to ship pre-assembled. This adds labor hours and increases the risk of damage.
Loading dock and delivery access. If your building has a loading dock, confirm the dock height matches the delivery truck. If the dock is not available, the crew may need a lift gate or a ramp, which adds time and cost. Reserve the dock and the freight elevator in writing, not just verbally.
Climate and humidity control. Wood veneers and laminate surfaces can warp in extreme humidity. The installation area should be at a stable temperature (65-75°F) and humidity (35-55%) for at least 48 hours before installation. If the space has been unoccupied and unheated, bring it to operating conditions early.
Waste and recycling logistics. A full office installation generates a significant volume of cardboard, plastic wrap, and foam. Confirm whether your building has a recycling program and where the bins are located. If the installer handles disposal, ask whether they separate recyclables or send everything to a landfill. Many municipalities now charge extra for construction debris, so this can affect your final bill.
Download this checklist and walk your space with the lead installer during the pre-installation survey. A 30-minute walkthrough that catches a floor slope or an outlet gap will save you hours of delay on installation day.
The Reconfiguration and Decommissioning Angle
If you are not installing new furniture but reconfiguring existing workstations, the checklist changes. You need to plan for the decommissioning of the old layout before the new one goes in. This includes:
- Labeling every panel, tile, and component before disassembly so the reconfiguration crew knows what goes where.
- Storing reusable components in a clean, dry area away from the installation zone.
- Coordinating the removal of furniture that will not be reused. Many providers offer decommissioning services that include disassembly, removal, and recycling. Ask whether they can donate usable furniture to a local nonprofit, this can provide a tax benefit and keeps furniture out of landfills.
A professional installer will document what was installed and where. This asset inventory becomes valuable when you reconfigure again in a few years, because you know exactly which panels, tiles, and components are available to reuse. Ask your installer for this documentation as part of the final walkthrough.
DIY vs. Professional Installation: A Cost-Benefit Analysis
The DIY route for office furniture installation saves money on labor but costs more in time, risk, and potential damage. For a single desk or a home office chair, assembling it yourself makes sense. For a full office floor, the math changes quickly.
Consider what DIY actually involves. Your team must unbox every carton, sort hundreds of pieces of hardware, decipher assembly instructions, and build each unit correctly. A two-person team assembling 15 modular workstations will spend several full days on the task, time they cannot spend on their actual jobs. If a panel is installed upside down or a connector is over-torqued, the damage may void the manufacturer’s warranty.
Professional installers bring their own tools, including the specialized bits and drivers required for specific brands. They also carry liability insurance, which protects you if a piece of furniture is damaged during assembly. The Occupational Safety and Health Administration guidance on ergonomics highlights how proper workstation setup affects worker comfort and safety, and a professional ensures that monitor arms, keyboard trays, and chairs are adjusted to support healthy posture.
The hybrid approach works best for many businesses. Hire professionals for the modular systems and complex panel installations, then have your own team handle simple tasks like unpacking and placing accessories. This balances cost control with the guarantee that the high-value, complex pieces are done right.
Ergonomic Setup Standards and Sustainability After Installation
Installation is not finished when the last panel clicks into place. Ergonomic setup standards determine whether your team works comfortably or develops chronic pain over the next year.
Ergonomic installation goes beyond placing a chair at a desk. The CDC workplace health resources recommend that a workstation supports neutral posture: elbows at a 90-degree angle, monitor at arm’s length with the top of the screen at eye level, and feet flat on the floor. A professional installer positions monitor arms, keyboard trays, and chairs to these specifications rather than simply dropping them on the surface.
Sustainability also extends past recycling cartons. When you reconfigure an office, old furniture rarely needs to go to a landfill. Commercial furniture from brands like Steelcase and Herman Miller is built to be disassembled, reconfigured, and reused across multiple office generations. Working with a provider that handles furniture decommissioning and asset management keeps usable pieces in circulation and out of the waste stream.
A responsible installation partner will also document what was installed and where. This asset inventory becomes valuable when you reconfigure again in a few years, because you know exactly which panels, tiles, and components are available to reuse.
Conclusion: Start Your Office Furniture Project Right
A successful office furniture project depends on preparation, the right installation partner, and a realistic timeline. Skimping on the installation process risks damaging expensive furniture and delaying your team’s move-in date.
Office Furniture Warehouse simplifies the entire journey. With over 35 years of experience and a 4-acre inventory of new and pre-owned furniture from premium brands like Steelcase and Herman Miller, we handle everything from space planning to delivery coordination. Our team helps you fit high-quality brands into your budget and ensures your installation project starts with the right pieces, not just the right price.
Visit our showroom today to see how we can support your next office fit-out.
Frequently Asked Questions
How much does it cost to pay someone to assemble furniture?
The cost for professional office furniture assembly varies based on the project’s complexity, the number of pieces, and your location. For a full office installation, most providers give a project-based quote after a site inspection. Contact Office Furniture Warehouse for a detailed estimate tailored to your specific furniture and layout.
What is the difference between furniture assembly and full-scale installation?
Furniture assembly typically means putting together individual pieces like chairs or desks. Full-scale office furniture installation is a more comprehensive service. It includes onsite assembly, but also involves project management, space planning, positioning modular systems, connecting panel systems, and ensuring ergonomic installation. Professionals handle the entire process from delivery to final placement, ensuring your office layout is functional and ready for use.
How long does a typical office furniture installation project take?
The furniture installation project timeline depends on the scope of work. Installing a single workstation might take a few hours, while outfitting an entire floor with dozens of cubicles and offices can take several days. The timeline is affected by the complexity of the furniture, site readiness, and the number of installers on the team. A professional service will provide a clear schedule after assessing your project.
How do I prepare my workspace for professional furniture installation?
Use an office furniture installation checklist to prepare. Ensure the area is clean, clear of debris, and that all pathways for moving furniture are unobstructed. Confirm that the space is ready for the new layout, and that any old furniture has been removed. Also, make sure a responsible person is on-site to answer questions from the installation team. This preparation helps keep the project on schedule.
This article was written using GrandRanker
