Table of Contents
- Step 1: Gather the Best Cleaning Supplies for Office Furniture
- Step 2: Inspect for Pests and Deep Clean vs. Surface Clean
- Step 3: How to Clean Steelcase Chair Upholstery
- Step 4: Cleaning Leather, Faux Leather, and Mesh Chair Backs
- Step 5: Removing Odors from Used Office Chairs
- Step 6: Disinfecting and Sanitizing Hard Surfaces
- Conclusion: Maintaining Your Clean Used Office Furniture
- Frequently Asked Questions
Last Updated: September 27, 2026
Step 1: Gather the Best Cleaning Supplies for Office Furniture
The best cleaning supplies for office furniture are a microfiber cloth, mild dish soap, lukewarm water, a vacuum with a crevice tool, and a spray bottle. Add a soft scrub brush, a lint roller, and a leather conditioner if your pieces have fabric or leather surfaces.
Here is what to keep on hand:
- Microfiber cloths for dusting and wiping
- Mild dish soap mixed with lukewarm water
- Vacuum attachment with a crevice tool for seams
- Soft scrub brush for fabric and mesh backing
- Lint roller for quick touch-ups
- Leather conditioner for leather and faux leather
- Non-toxic cleaner for plastic components and metal frames
Never mix bleach and ammonia-based cleaners. The fumes are toxic, and the combo can discolor plastic components and metal frames permanently.
Step 2: Inspect for Pests and Deep Clean vs. Surface Clean
Pest inspection is the step most guides skip, and it matters most with secondhand furniture. Before you clean anything, flip the piece over and check seams, cushion gaps, and the underside of the seat. Do this in a garage, driveway, or loading dock, never in the room where the piece will live. A common pattern among resellers is to inspect outdoors, treat outdoors, and only then carry the piece inside.
Where to look, in order
Work from the underside up, because that is where pests travel and where most buyers never look.
- Underside of the seat pan and dust cover. Run a gloved hand along the black fabric liner stapled to the bottom of the chair. Bed bugs and their shed skins collect in the folds.
- Cushion seams and piping. Pull the fabric taut along each seam and look into the fold. This is the single most common harborage on task chairs.
- Between the seat cushion and the frame. On chairs with removable cushions, lift the cushion and inspect the deck underneath.
- Armrest pads and the gap where they meet the frame.
- Casters and the base column. Hair, dust, and egg casings wrap around the axle.
- Drawer interiors and the underside of desk tops. On casegoods, pull every drawer completely out and inspect the runner and the back panel.
What you are actually looking for
- Bed bugs: live insects about the size of an apple seed, rusty-red to mahogany; small dark specks (fecal spotting) along seams; translucent shed skins; tiny pale eggs glued into fabric folds; a sweet, musty odor in heavy infestations.
- Carpet beetles: tiny oval beetles and the bristly, carrot-shaped larvae they leave behind. They feed on fabric and hair and are far more common in office furniture than bed bugs.
- Cockroaches: dark cylindrical droppings, egg cases (oothecae) glued into crevices, and a greasy odor.
- Dust mites: not visible to the eye. You infer them from musty odor and from the amount of dust that puffs out of the cushion when you press it.
- Rodent evidence: gnaw marks, droppings, and shredded paper or fabric nesting material inside drawers and under seat pans.
If you find signs of bed bugs
Isolate the piece immediately. Do not carry it through the building. Bag it in heavy plastic, or wrap it in stretch film, and keep it outside until it is treated.
- Heat treatment. Bed bugs die when their entire body reaches roughly 122°F, so a professional heat chamber held above that threshold for the required dwell time is the most reliable single treatment for upholstered furniture. This is the method most pest control operators reach for on chairs and sofas.
- Steam. A steamer with a surface temperature above 212°F, applied slowly along seams and folds, kills bugs and eggs on contact. It does not penetrate deep into foam, so it is a supplement, not a standalone fix.
- Residual insecticide. Applied by a licensed pest control operator to seams, the underside, and the frame. Do not fog or spray a chair yourself and then sit in it.
- Discard. For a low-value piece with a heavy infestation, disposal is often the cheaper and safer call.
Never bring a piece with visible bed bug activity into a shared workspace to “deal with it later.” A single fertilized female can seed an entire floor of cubicles, and remediation costs run far beyond the price of the furniture.
Deep cleaning vs. surface cleaning
Once the piece is pest-free, decide how hard to clean it. Surface cleaning handles dust and light grime on a routine basis. Deep cleaning targets stains, odors, and bacterial growth that build up over years of use.
| Situation | Cleaning Type | Frequency |
|---|---|---|
| Newly purchased used piece | Deep clean first | Once, on arrival |
| Daily-use desk or chair | Surface clean | Weekly |
| Visible stains or odors | Deep clean | As needed |
| Fabric upholstery | Deep clean | Every 3-6 months |
Step 3: How to Clean Steelcase Chair Upholstery
To clean Steelcase chair upholstery, vacuum the fabric first, then spot-clean stains with a mild soap solution and a microfiber cloth. Blot, do not rub. Let the fabric air dry completely before use.
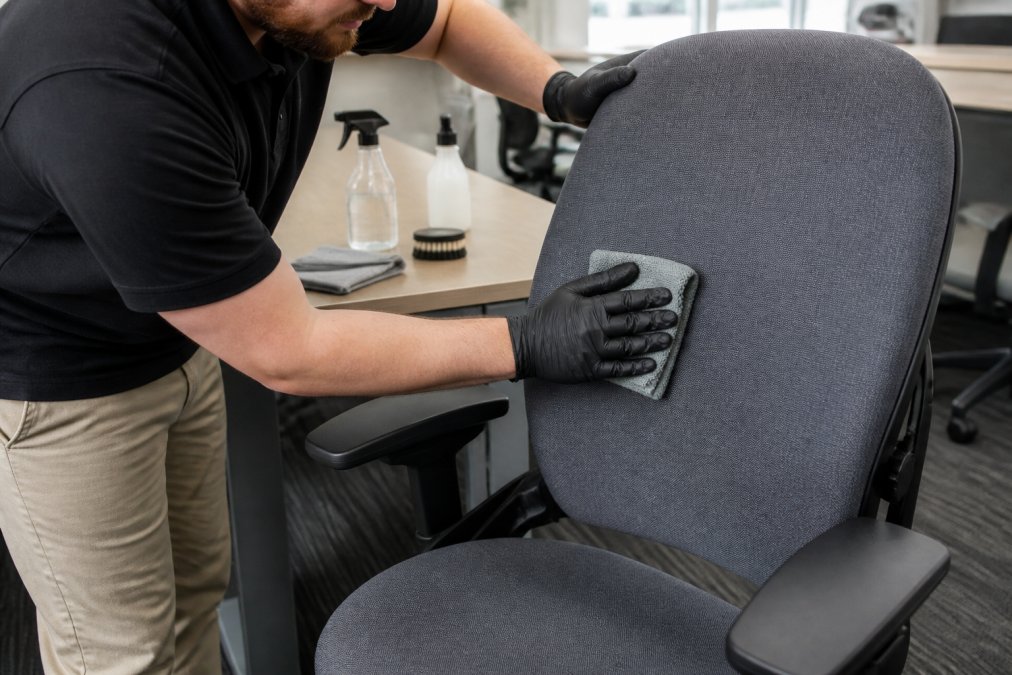
Follow these steps:
- Vacuum the seat, back, and seams with a brush attachment.
- Mix a few drops of mild dish soap with lukewarm water.
- Dip a microfiber cloth, wring it out until damp.
- Blot stains from the outside in.
- Rinse with a clean damp cloth.
- Air dry away from direct heat.
Step 4: Cleaning Leather, Faux Leather, and Mesh Chair Backs
Leather, faux leather, and mesh each need a different approach. Using one cleaner on all three is how people cause chemical damage without realizing it.
Press a lint roller across mesh and fabric before you wet-clean. It lifts surface debris and hair so your cloth does not just push grime deeper into the weave.
Step 5: Removing Odors from Used Office Chairs
Removing odors from used office chairs starts with identifying the source, because each source needs a different treatment. Most smells come from trapped moisture, body oils, smoke, or microbial growth in the foam and fabric, not the surface. Wiping the surface of a chair that smells like old sweat or cigarettes does nothing, the odor is in the foam.
Match the treatment to the source
- Musty, damp odor. Microbial growth in foam or a damp dust cover. Fix the moisture first: vacuum thoroughly, then dry the piece in moving air. A dehumidifier in a small room speeds this up. Once dry, an enzyme cleaner breaks down the residue the microbes were feeding on.
- Body oils and sweat. These bind to fabric fibers and oxidize into a sour smell. A mild soap solution with a soft brush, followed by a clean-water rinse and full drying, lifts them. Baking soda alone will not.
- Tobacco smoke. Smoke residue is a cocktail of tar and volatile compounds that cling to foam and fabric. This is the hardest odor to remove. Multiple rounds of enzyme cleaner plus extended airing are usually required, and some pieces never fully lose it.
- Chemical or new-plastic smell. Off-gassing from foam, adhesives, or a recently applied finish. Air the piece in a shaded, ventilated space for several days. Heat accelerates off-gassing, so a warm room helps, but keep the piece out of direct sun, which can fade fabric and crack leather.
- Pet odor. Enzymatic cleaners are the only category that reliably breaks down the uric acid crystals. Standard soaps and baking soda mask it temporarily.
A sequence that works
- Vacuum everything, including under the seat and inside the base column. Odor-causing dust and debris hide there.
- Apply an enzyme cleaner to the fabric per the label, work it in with a soft brush, and let it dwell for the full contact time. Do not rush this step.
- Rinse with a clean, damp microfiber cloth to lift residue. Repeat if the rinse water comes away dirty.
- Dry completely with airflow, a fan, an open window, or a dehumidifier. Damp foam will re-grow the smell within days.
- For hard surfaces, wipe with a mild soap solution and dry. Do not soak wood or particleboard edges.
- Air the piece in shade for a few hours after cleaning.
What to avoid
- Masking sprays and plug-in air fresheners. They cover the smell for a day and then it returns, often worse because the underlying residue is still there.
- Ozone generators. Ozone is a respiratory irritant and is not a safe DIY treatment in an occupied space (the EPA). If a piece needs ozone, that is a job for a professional with the right equipment and an empty, ventilated area.
- Bleach on fabric or foam. It damages fibers, leaves its own odor, and does not reach the source.
- Over-wetting. Pushing water into foam creates the exact damp environment that causes musty odors in the first place.
If the odor persists after two full rounds of enzyme cleaning and complete drying, the foam is likely saturated with residue or microbial growth. At that point, professional upholstery extraction or replacement of the cushion is the realistic fix, and for a low-cost used chair, replacement is often the better value.
If the odor stays after two rounds, the foam may be holding moisture. In that case, the piece likely needs professional cleaning or replacement.
Step 6: Disinfecting and Sanitizing Hard Surfaces
Disinfecting and sanitizing hard surfaces means cleaning first, then applying a disinfectant. Cleaning removes surface debris and grime. Disinfecting kills germs that remain.
Use this order every time:
- Wipe the surface with a damp cloth and mild soap.
- Let it dry.
- Apply a disinfectant made for the surface type.
- Let it sit for the contact time on the label.
- Wipe dry with a clean cloth.
Clean first, disinfect second. A disinfectant applied over dirt and oils cannot reach the germs underneath, so the whole step is wasted.
Conclusion: Maintaining Your Clean Used Office Furniture
Keeping used office furniture clean comes down to routine, not heavy effort. A weekly wipe-down, a monthly vacuum, and a deep clean twice a year prevent most problems before they start.
Frequently Asked Questions
How do you sanitize used furniture?
Sanitizing used furniture requires a two-step process: cleaning and then disinfecting. First, remove all surface debris and dust with a vacuum attachment and a damp cloth. Next, apply a disinfectant spray or wipe that is safe for the material. For fabric, use a fabric-safe disinfectant or steam cleaner. For hard surfaces, a diluted mild dish soap followed by an EPA-registered disinfectant works well. Always spot-clean in a hidden area first to check for colorfastness.
What is the best way to disinfect an office chair?
The best way to disinfect an office chair depends on its material. For fabric chairs, vacuum thoroughly, then use a steam cleaner or a fabric-safe disinfectant spray, allowing it to air dry completely. For leather or faux leather, wipe with a damp cloth using a mild soap solution, then follow with a leather conditioner. For mesh backs, use a soft brush and a non-toxic cleaner. Avoid over-wetting any material, as moisture can damage foam and cause bacterial growth.
How do you remove odors from used office chairs?
Removing odors from used office chairs starts with identifying the source. Vacuum all crevices with a crevice tool to remove debris. For deeper odors, an enzyme cleaner can be applied to the fabric, worked in with a soft brush, and allowed to dwell for the full contact time. Rinse with a clean, damp microfiber cloth to lift residue. Allow the chair to air dry completely with airflow in a well-ventilated area.
What cleaning products are safe for high-end office furniture?
For high-end furniture like Steelcase or Herman Miller, always use mild, non-toxic cleaners. A solution of lukewarm water and a few drops of mild dish soap is safe for most upholstery and hard surfaces. For leather, use a dedicated leather cleaner and conditioner. Avoid solvent-based cleaners, abrasive scrub brushes, and excessive water, as these can cause chemical damage to finishes and fabrics. Always test any cleaner on a small, hidden area first.
