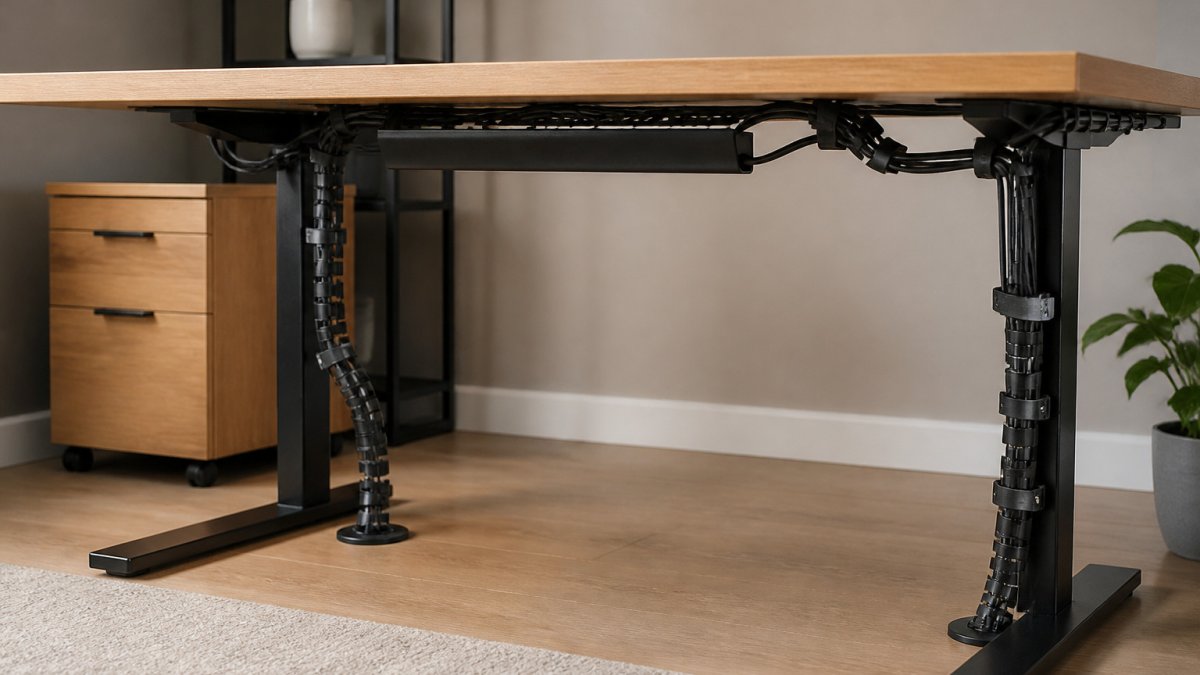
Quick Summary
Cable management in a home office starts with a cable audit to count what you truly need, then a plan matched to your desk layout. Mount a surge-protected power strip under the desk, route cables along the back edge, and bundle or conceal the rest.
- Start by listing every cord and marking which ones you use daily.
- Sketch your desk layout first; a wall-side desk and a center desk need different routes.
- Choose a surge protector with a joule rating and a working indicator light.
- Clip cables every 8 to 12 inches along the desk frame to hold them in place.
- A J channel hides wires in a slot and needs no drilling through furniture.
Table of Contents
- Start With a Cable Audit: Which Cables and Devices You Actually Need
- Plan Cable Management for Your Desk Layout
- Mount a Power Strip or Surge Protector Under the Desk
- Route Cables Along the Underside and Back of the Desk
- Conceal Excess Wiring With a J Channel Cable Management System
- Bundle and Secure Cables With a Cable Management Net or Sleeve
- Organize Cords With a Cable Management Tube and Keep It Working
- Your Next Step: Set Up a Cable-Free Desk Before You Buy More Furniture
- Frequently Asked Questions
7 Steps to Manage Cables in a Home Office
Last Updated: November 3, 2026
Start With a Cable Audit: Which Cables and Devices You Actually Need
Most home offices have more cables than anyone needs. Starting with a simple count before buying any clips, trays or sleeves is a sensible first step. Cable management is much easier when you know exactly what has to reach the desk.
Walk around your desk and list every cord you can find. Include power cables, charging cables, monitor cables, and network cables. Then mark which ones you use every day and which ones you rarely touch.
-
Keep: laptop power, monitor cables, keyboard and mouse, desk lamp
-
Test: old chargers, spare USB cables, unused adapters
-
Remove: cables for devices you no longer own
Once you know your real list, the rest of the steps get much simpler.
Plan Cable Management for Your Desk Layout
Your desk’s position in the room decides which routes are possible, so plan the layout before you buy a single clip. A route that works for a desk against a wall fails for a desk floating in the middle of a room, and a shared desk needs different access than a solo one.
Sketch the desk from above and mark four things: wall outlets, the device cluster (computer, dock, monitor), the fixed items (lamp, speakers, printer), and the walking paths around the desk. Then choose a plan that matches your layout:
- Desk against a wall. Run the main bundle down the back edge and drop it to the outlet in one vertical run. This is the easiest layout because the wall hides the drop. Use a raceway or J-channel on the wall if you cannot hide the drop behind the desk.
- Desk in the center of a room. You have no wall to hide behind, so route everything to a single point under the desk and drop one bundle to the floor, then run it under a floor cord cover to the nearest outlet. Keep the drop at the back of the desk, away from the side you walk past.
- Shared or multi-user desk. Preserve access: label each cable at both ends, keep the power strip switch reachable from the seated position, and leave slack so a second person can plug in a laptop without unplugging someone else’s device.
- Compact workspace. Vertical space is your friend. Mount the strip and a small tray on the underside or the back panel, use short cables where possible, and keep the floor under the desk clear so your feet and chair wheels have room.
For every layout, follow three routing rules. First, keep power and data cables on separate paths where you can, running a network or USB cable parallel to a power cord for a long stretch can introduce interference. Second, leave a service loop of slack at each device so you can pull the device forward without straining the connector. Third, keep cables out of the chair’s wheel path and out of the foot space; a cable that crosses where you roll will eventually be rolled over.
If you use a height-adjustable desk, plan for movement now rather than later. Leave enough slack at the desk-to-wall transition for the desk to travel its full range, and bundle the cables so they move as one unit instead of snagging individually. A common pattern is to anchor the bundle to the desk frame and let it flex at a single point near the floor.
Watch out: a route that looks clean at sitting height can pull taut when a standing desk rises, so test the full range of motion before you fasten the last clip.
The article lists the layout options and the routing rules that apply to each one.
| Desk layout | Recommended route | Key tip |
|---|---|---|
| Desk against a wall | Run the main bundle down the back edge | Wall hides the drop to the outlet |
| Desk in the center of a room | Route to one point and drop under floor cord cover | Keep the drop away from the walking side |
| Shared or multi-user desk | Label cables at both ends | Leave slack for a second person |
| Compact workspace | Mount strip and tray underneath or on back panel | Keep floor clear for feet and chair wheels |
Mount a Power Strip or Surge Protector Under the Desk
Mounting a power strip under the desk is the single step that removes the most clutter from the floor, but it is also the step where cable management turns into electrical planning. Treat it as a safety decision first and a tidiness decision second.
Start by choosing the right device. A surge protector is not the same as a basic power strip. Look for a protector with a joule rating and a light or audible indicator that shows the protection is still active. A plain power strip with no surge rating protects nothing; it only adds outlets.
Next, plan the load. Every strip has a maximum amperage and wattage printed on it or in its instructions. Add up the wattage of everything you intend to plug in, a typical laptop charger, monitor, desk lamp, speakers, and phone charger are modest, but a space heater, laser printer, or coffee maker can exceed a strip’s rating on its own. Keep high-draw appliances on their own wall outlet, not on the strip. If the strip feels warm to the touch or the breaker trips, you are overloading it.
Pick a mounting spot on the underside of the desk that is reachable without crawling on the floor, and keep the strip away from heat sources, sharp edges, and anything that blocks airflow around it. Clean and dry the surface before applying adhesive; most under-desk brackets use adhesive pads or screws, and adhesive fails on dusty or oily laminate. If you rent or do not want to drill, clamp-on brackets that grip the desk frame are a damage-free option.
Route the strip’s own cord so it does not hang in a loop that a chair wheel can catch, and leave the strip’s switch accessible so you can cut power to the whole desk in one motion. Do not daisy-chain one strip into another, and do not run the strip’s cord under a rug or through a doorway where it can be pinched.
Route Cables Along the Underside and Back of the Desk
Running cables along the back and underside of the desk makes them nearly invisible from the front. Start at the device and work toward the power strip. Lay each cable along the desk frame and use clips every 8 to 12 inches to hold it in place.
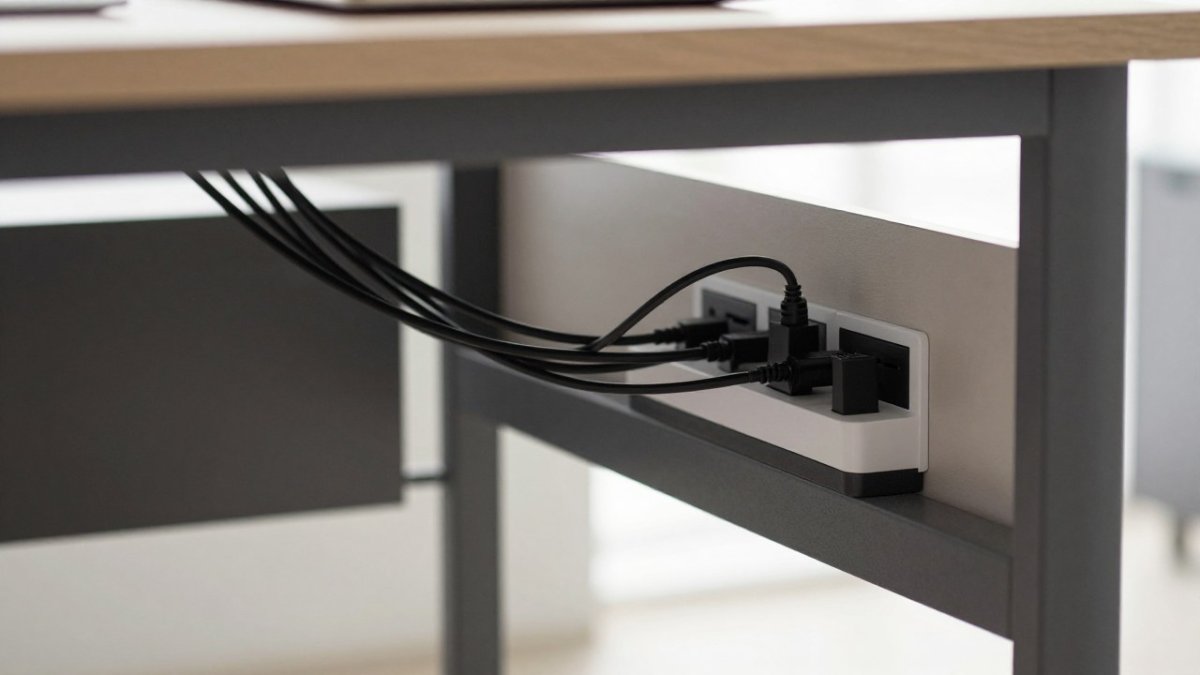
Keep power and data cables from tangling by running them on separate paths when you can. Leave a small loop of slack near the computer so you can move it without strain.
Conceal Excess Wiring With a J Channel Cable Management System
A J channel is a plastic or metal track with a slot along one side. It attaches to the back of the desk or to a wall, and cables slide into the slot. This hides wires from view and keeps them in a neat line.
Measure the length of your desk’s back edge before buying. Cut the channel to size if needed, then mount it with the included screws or adhesive. Push each cable into the slot in the order it will run from device to outlet.
This method works well for people who want a clean look without drilling through furniture.
Bundle and Secure Cables With a Cable Management Net or Sleeve
Once cables are routed, bundle them so they stay together. A cable management net or sleeve wraps several cords into one tidy group. This keeps them from sliding apart or getting tangled when you move your chair.
Slide the bundle into the sleeve or net, then fasten the ends with hook-and-loop straps. Do not pull the straps too tight, because pressure can damage the insulation over time. Check the bundle every few months to make sure nothing has loosened.
Organize Cords With a Cable Management Tube and Keep It Working
Cut the tube so it reaches from the desk to the outlet with a small amount of room left. Feed the cables inside, then attach the ends with clips. Keep the tube clear of hot devices and check it regularly for dust buildup.
A system only works if you keep using it. Each time you add a new device, route its cable through the same path. Set a reminder to review the setup every few months.
Your Next Step: Set Up a Cable-Free Desk Before You Buy More Furniture
A clean cable setup is one of the best first steps for any home office. Once your cables are organized, it becomes much easier to judge what furniture your workspace actually needs. Office Furniture Warehouse can help you plan the layout, choose the right storage, and find pieces that fit your space. Visit our showroom or contact our team to start building a desk setup that stays organized for the long term.
Frequently Asked Questions
How do I organize cables in a home office?
Start by listing every cable and device you use, then unplug anything you no longer need. Group the remaining cables by function, such as power, video, and peripherals. Mount a power strip under the desk, route cords along the underside of the desk using adhesive clips, and bundle them with reusable Velcro straps. Leave a small amount of slack near each device so you can move your desk or chair without strain on the connections.
What is the best way to hide cables under a desk?
A J channel or cable tray attached under the desk edge can hide cables neatly. Run the main cord bundle through the channel, then use a cable management tube or sleeve for the segments that drop to the floor. For renters or anyone who wants no drilling, adhesive-backed cable clips and a freestanding cable tray can achieve a similar look without permanent changes to the desk.
What tools do you need for desk cable management?
Most setups need only reusable Velcro straps or cable ties, adhesive cable clips, and a mounting kit for a power strip or cable tray. A cable management net or sleeve helps group cords at the back of the desk. Measure the cord lengths you have before buying, so you avoid purchasing sleeves or channels that are too long or too short for your layout.

