Table of Contents
- What You’ll Need to Clean Used Office Chairs
- Step 1: Prep the Chair and Vacuum Every Surface
- Step 2: How to Clean Fabric and Upholstery
- Step 3: Cleaning Leather and Faux Leather Seats
- Step 4: How to Clean Mesh Office Chairs
- Step 5: How to Disinfect Used Office Furniture
- Step 6: Spot Cleaning Ink, Coffee, and Oil Stains
- Step 7: Drying, Reassembling, and Maintenance Tips
- Frequently Asked Questions
Last Updated: September 9, 2026
Buying pre-owned seating can save your company hundreds of dollars per unit, but a used chair that arrives with dust, stains, or lingering odors will not make a professional impression. Knowing how to clean used office chairs properly is the difference between a workspace that looks polished and one that looks thrifty. In this guide from Office Furniture Warehouse, we break down a material-specific, step-by-step process covering fabric, leather, and mesh surfaces.
What You’ll Need to Clean Used Office Chairs
Before you start, gather the right supplies. Using the wrong product is the fastest way to damage upholstery or leave a sticky residue that attracts more dirt.
- Vacuum with crevice tool and upholstery brush attachments
- Mild dish soap and lukewarm water
- Microfiber cloths (several, for different stages)
- Upholstery cleaner or foam specifically for fabric weave
- Leather conditioner and saddle soap for leather seats
- pH-balanced sanitizing spray or disinfectant
- Soft-bristled brush for spot treatment
- Clean, dry towels for blotting
Avoid all-purpose spray cleaners; many contain bleach or harsh solvents that damage synthetic fabric and faux leather. Stick to pH-balanced products designed for the specific material you are cleaning.
Keep separate cloths for cleaning and drying. Reusing a wet, soapy cloth to dry a surface just redistributes the residue you are trying to remove.
Step 1: Prep the Chair and Vacuum Every Surface
Cleaning used office chairs starts with dry removal of loose debris. Vacuuming first prevents dirt from turning into mud when you introduce moisture later.
Remove the seat cushion if it is detachable, and flip the chair upside down. Use the crevice tool to reach into seams, around the gas cylinder, and along the base, especially where the backrest meets the seat.
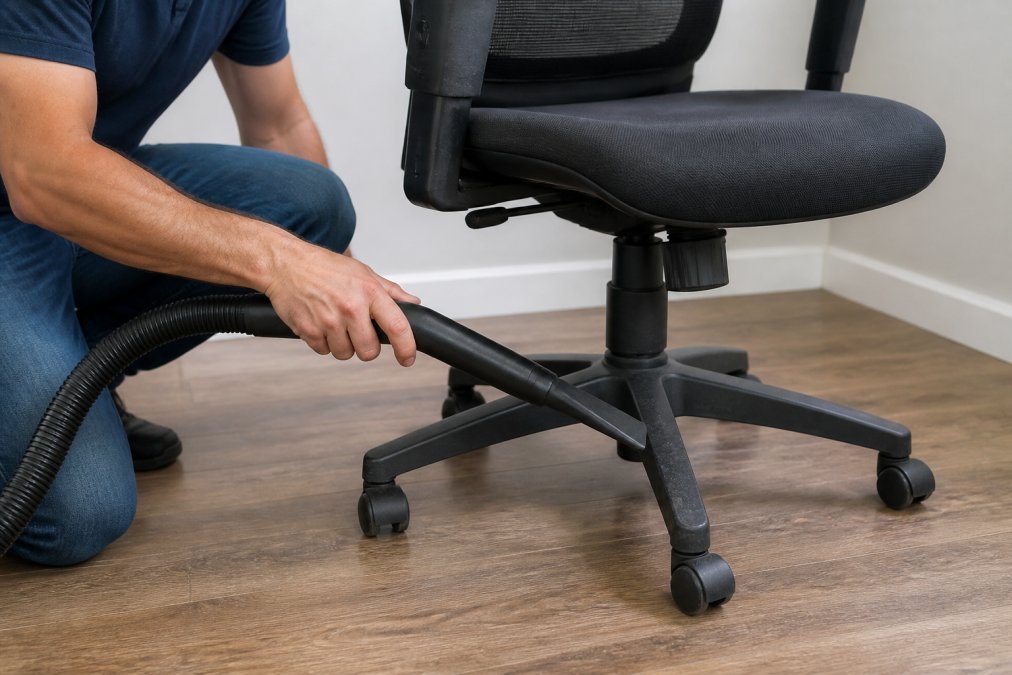
Work through the entire surface methodically: headrest, backrest, seat, armrests, and the base. For fabric, follow with the upholstery brush attachment to lift embedded dust.
Step 2: How to Clean Fabric and Upholstery
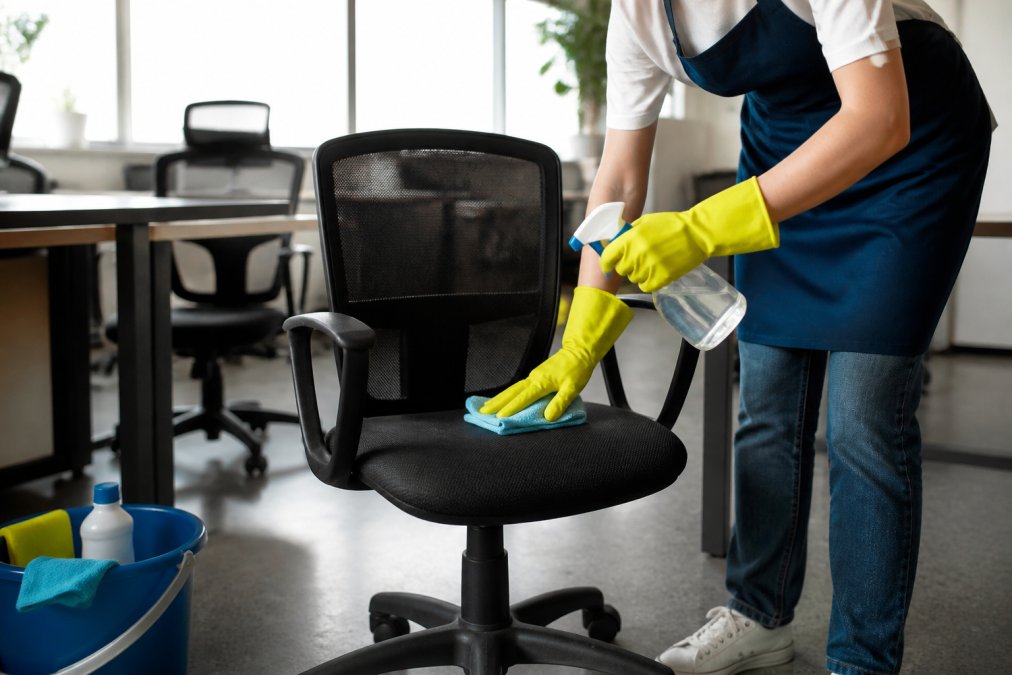
Fabric upholstery holds onto oils, dead skin cells, and dust more than any other material. For most fabric chairs, a solution of mild dish soap and lukewarm water works well.
Dip a microfiber cloth into the solution and wring it out thoroughly, you want a damp cloth, not a wet one. Wipe the fabric in overlapping strokes, then blot away excess moisture. For heavier soil, apply an upholstery cleaner or foam, working it in with a soft-bristled brush using circular motions. Avoid aggressive scrubbing, which can damage the weave.
Rinse by wiping with a cloth dampened in plain water, then blot dry to remove soap residue that would otherwise attract new dirt.
Never saturate fabric upholstery. Water that soaks through to the foam padding takes days to dry and can lead to mildew, which produces a musty odor that is nearly impossible to remove.
Step 3: Cleaning Leather and Faux Leather Seats
Leather requires a different approach than fabric. The goal is to remove dirt without stripping the natural oils that keep the material supple and prevent cracking.
Start by wiping the surface with a dry microfiber cloth. For light cleaning, use saddle soap on a slightly damp cloth, working it into a lather and wiping it off with a clean, damp cloth. Follow immediately with a leather conditioner to restore moisture. For faux leather, skip the conditioner if it is not designed for synthetic materials.
Leather is sensitive to heat and direct sunlight. Dry the chair away from windows and radiators, since rapid drying causes cracking. Air dry at room temperature instead.
Step 4: How to Clean Mesh Office Chairs
Mesh backrests are popular for their breathability and ergonomic support, but their open weave traps dust and skin cells in a way solid surfaces do not.
Cleaning mesh requires a two-sided approach. Vacuum both the front and back to pull debris through the weave. Then mix a small amount of mild dish soap with lukewarm water, dampen a microfiber cloth, and wipe both sides. Rinse with a plain damp cloth until no suds remain.
For stubborn body-oil buildup along the lumbar area, apply upholstery foam and let it sit for five minutes before wiping. Mesh dries quickly, but a fan can speed the process.
Step 5: How to Disinfect Used Office Furniture
Cleaning removes visible dirt, but disinfecting kills the bacteria and viruses that remain. This matters most for chairs multiple people have used, since germs can linger on armrests and seat surfaces for days.
After cleaning, apply a pH-balanced sanitizing spray or disinfectant to all high-touch areas: armrests, seat edges, and the backrest. Check the label to confirm the product is safe for your chair’s material. Many disinfectants contain alcohol, which can dry out leather and damage some synthetic fabrics.
Let the disinfectant sit for the contact time listed on the label, usually 30 seconds to a few minutes, then wipe dry. For a deep clean, steam cleaning is effective for fabric chairs, but do it carefully to avoid over-saturating the padding.
Step 6: Spot Cleaning Ink, Coffee, and Oil Stains
Stains on a used chair are rarely generic, a ballpoint pen burst, a knocked-over mug of coffee, or the invisible buildup of skin oils. Treating each type requires a different solvent because each stain binds to the fabric differently. The golden rule still applies: dab, never rub. Rubbing grinds the stain deeper into the fibers and can crush the weave.
Before any treatment, test your solvent on a hidden area, under the seat or inside the backrest cover, to confirm it will not bleach or distort the dye. Wait 60 seconds and blot with a white cloth. If any color transfers, stop and switch to a milder approach.
Ink Stains (Ballpoint, Gel, and Marker)
Ink is a dye suspended in a carrier solvent. To lift it, you need a solvent that can dissolve the dye without attacking the fabric’s own color. Isopropyl alcohol (70% concentration, not the 91% version, which can be too aggressive on synthetic dyes) is the standard first choice (peer-reviewed research).
- Place a clean, dry white towel underneath the stained area if you can access the back of the fabric.
- Dampen a cotton swab or microfiber cloth with the alcohol, damp, not dripping.
- Dab the stain from the outside edge inward to prevent spreading.
- Blot with a dry section of the towel. Repeat with fresh alcohol until no more ink lifts.
- Rinse with a cloth dampened in plain water, then blot dry.
For permanent marker, acetone (nail polish remover) is more effective, but it will dissolve some synthetic fabrics and many faux leathers. Use it only on cotton or wool blends, and test first. If the stain is old and set, you may need to repeat the process several times.
Coffee and Tea Stains
Coffee and tea contain tannins, organic compounds that bind quickly to fabric fibers. They are water-soluble when fresh, but heat sets them permanently. If the stain is already dry, you are working against time.
- Blot the fresh stain immediately with a dry cloth to absorb as much liquid as possible.
- Mix one teaspoon of mild dish soap (like Dawn or Seventh Generation) into one cup of lukewarm water.
- Working from the outside edge inward, blot the stain with the solution. Do not pour it on, you want to lift the stain, not push it deeper.
- Rinse with a cloth dampened in plain water, then blot dry.
If the stain is dried, try a 1:1 solution of white vinegar and water. Vinegar’s acidity helps break down the tannin bonds. Apply it the same way, blotting from the edge inward. For stubborn dried coffee on light-colored fabric, a paste of baking soda and water applied for 15 minutes can pull the stain out, but it will not work on synthetic microfiber, the paste gets trapped in the weave.
Oil and Grease Stains
Oil does not dissolve in water, so soap-and-water alone will not work. Oil needs to be absorbed first, then emulsified.
- Cover the stain generously with cornstarch or baking soda. These powders wick the oil out of the fabric through capillary action.
- Let it sit for at least 15 minutes (30 for heavy grease). Do not press down, you will push the oil deeper.
- Vacuum up the powder.
- Apply a degreasing dish soap (Dawn is the standard) directly to the spot, work it in gently with your fingertips or a soft brush, and let it sit for 5 minutes.
- Blot with a damp cloth, rinse, and blot dry.
For oil on leather, skip the powder. Wipe the surface with a dry cloth, then use saddle soap to lift the oil. Follow with leather conditioner, because the soap will strip natural oils along with the stain.
The Stain-Specific Quick Reference
| Stain Type | Solvent/Absorbent | Why It Works | Critical Mistake to Avoid |
|---|---|---|---|
| Ballpoint ink | 70% isopropyl alcohol | Dissolves the dye carrier | Using 91% alcohol on synthetics, can bleach the fabric |
| Permanent marker | Acetone (cotton/wool only) | Dissolves the resin binder | Using on polyester or faux leather, will melt the surface |
| Coffee/Tea (fresh) | Dish soap + lukewarm water | Emulsifies tannins before they set | Using hot water, heat sets the stain permanently |
| Coffee/Tea (dried) | 1:1 white vinegar + water | Acid breaks tannin bonds | Scrubbing, spreads the stain |
| Oil/Grease | Cornstarch or baking soda, then degreasing soap | Powder wicks oil; soap emulsifies residue | Rubbing the powder in, pushes oil deeper |
| Blood | Cold water, then enzyme cleaner | Cold water prevents protein bonding | Using warm water, cooks the protein into the fabric |
| Wax | Ice cube, then scrape | Freezing makes wax brittle | Using heat, melts wax deeper into the weave |
Never combine bleach with any other cleaning agent (the CDC). The reaction produces toxic chlorine gas. If you are tempted to use bleach on a white fabric chair, switch to an oxygen-based cleaner like OxiClean, which is safe on most synthetics and does not produce fumes.
Match the solvent to the stain chemistry. Ink needs alcohol, coffee needs acid or soap, oil needs absorption first. Using the wrong solvent, or the right solvent at the wrong concentration, can turn a removable stain into a permanent one.
For stains that resist all home treatments, a professional upholstery cleaner with a hot-water extraction machine can often lift what hand cleaning cannot. That is a worthwhile investment for a high-end used chair from a brand like Steelcase or Herman Miller, where the cost of professional cleaning is a fraction of the replacement value.
Step 7: Drying, Reassembling, and Maintenance Tips
The final step determines whether your cleaning effort holds up, and whether the chair actually works properly when you sit in it. A used chair that looks clean but squeaks, wobbles, or sinks is not ready for a professional workspace. This section covers both drying and the mechanical maintenance that most cleaning guides ignore.
Drying: The Non-Negotiable Step
Allow the chair to air dry completely before reassembly or use. This takes 4 to 12 hours depending on the material and ambient humidity. Fabric takes longest because the weave holds moisture against the foam padding. Leather and mesh dry faster, but leather is vulnerable to cracking if dried too quickly.
- Place the chair in a well-ventilated room, ideally near a fan to circulate air.
- Avoid direct sunlight and radiators. Rapid drying causes leather to crack and can shrink synthetic fabrics.
- Do not reassemble cushions or use the chair until every surface is fully dry to the touch. Moisture trapped in the foam padding leads to mildew, which produces a musty odor that is nearly impossible to remove.
- For fabric chairs, a dehumidifier in the room can cut drying time by half.
Mechanical Maintenance: What Most Guides Skip
A used chair’s mechanical components, casters, gas cylinder, and tilt mechanism, accumulate dust, hair, and dried lubricant just like the upholstery does. Cleaning them is not optional if you want the chair to function properly. Here is how to troubleshoot the most common issues.
Casters: Squeaks, Stuck Wheels, and Hair Wrap
Casters are the most abused part of any office chair. They roll over carpet fibers, pick up hair, and collect dust in the wheel housing. A caster that does not roll smoothly will scratch hard flooring and make the chair difficult to move.
- Flip the chair upside down to access the caster stems.
- Pull each caster straight out of the base. Most casters use a friction-fit stem; a firm tug is all that is needed. If stuck, use a flathead screwdriver to pry gently between the caster housing and the base.
- Inspect the wheel axle. Hair and thread wrap tightly around the axle and act as a brake. Remove them with scissors or tweezers. For stubborn wraps, use a utility knife to cut through the hair, then pull it free.
- Clean the wheel housing with a crevice tool vacuum attachment. If caked with grime, soak them in warm soapy water for 10 minutes, then scrub with an old toothbrush.
- Apply a dry lubricant like powdered graphite or a silicone spray to the axle. Do not use WD-40, it attracts dust and will make the problem worse within weeks.
- Reinsert the caster and test the roll on a hard surface.
If a caster is cracked or the wheel no longer spins freely after cleaning, replace it. Standard caster stems are 7/8 inch or 1-1/4 inch in diameter. Measure the stem before ordering replacements. A set of five replacement casters costs $15 to $40 on Amazon or at an office supply store, far less than the cost of a scratched hardwood floor (osha.gov).
Gas Cylinder: Sinking or Sticking Height Adjustment
The gas cylinder is the piston that raises and lowers the seat. It is sealed and cannot be repaired, but it can be cleaned and lubricated to fix sticking.
- If the chair sinks slowly when you sit on it, the cylinder is failing. This is not fixable, you need a replacement cylinder. They are standardized components; measure the length of the old cylinder and order a compatible replacement for $25 to $60.
- If the height adjustment lever is stiff or the chair does not move when you pull the lever, the mechanism is likely clogged with dust. Wipe the cylinder shaft with a dry cloth, then apply a thin layer of silicone lubricant to the shaft. Work the lever up and down several times to distribute the lubricant.
- Do not use oil-based lubricants on the cylinder. They attract dust and will gum up the mechanism faster than no lubricant at all.
Tilt Mechanism and Armrests
The tilt mechanism under the seat controls the recline. It has springs and friction washers that can squeak after years of use.
- Locate the tension knob (usually under the seat, toward the front). Turn it to the loosest setting, then clean the exposed spring area with a dry cloth.
- Apply a small amount of white lithium grease to the spring pivot points. This is a heavy-duty lubricant that stays in place and does not attract dust.
- For squeaky armrests, check the mounting screws. A loose screw causes most armrest wobble. Tighten with a Phillips screwdriver. If the armrest pad is cracked or peeling, replacement pads are available for $10 to $25 and attach with adhesive or screws.
Establishing a Maintenance Routine
The best way to keep a used chair in working condition is to maintain it on a schedule. A common pattern among facility managers is:
- Weekly: Vacuum the seat and backrest. Wipe armrests with a disinfectant wipe.
- Monthly: Check caster axles for hair wrap. Tighten any loose screws on the armrests and tilt mechanism.
- Quarterly: Full cleaning of upholstery. Lubricate caster axles and the gas cylinder shaft.
- Annually: Inspect the gas cylinder for sinking. Replace casters if they show uneven wear.
Keep a small maintenance kit near your desk: a screwdriver, scissors, a small bottle of silicone lubricant, and a tube of white lithium grease. When you hear a squeak or feel a wobble, you can fix it immediately instead of adding it to a mental list you will forget.
A used office chair is a mechanical device as much as a piece of furniture. Cleaning the upholstery makes it look professional, but cleaning and lubricating the casters, cylinder, and tilt mechanism makes it function professionally. Ten minutes of mechanical maintenance during the drying period saves you from a chair that sinks, squeaks, or scratches your floors.
Once the chair is fully dry and mechanically sound, reassemble the seat cushion and test every adjustment. Sit in the chair, adjust the height, recline, and roll it across the floor. If everything moves smoothly, your used chair is ready for a second life.
Frequently Asked Questions
What is the best way to disinfect a used office chair?
Use a disinfectant spray or wipe that is safe for the chair’s material. For fabric, lightly mist with a disinfectant labeled for upholstery and let it air dry completely. For leather and vinyl, use a gentle disinfecting wipe or a cloth dampened with a diluted disinfectant solution. Always test on a small, hidden area first to check for color fastness or chemical damage.
How do I clean a smelly office chair?
Baking soda is effective for absorbing odors. Sprinkle a generous layer over fabric or mesh surfaces and let it sit for several hours, then vacuum it off thoroughly. For persistent smells, mix a small amount of mild dish soap with lukewarm water, lightly scrub the upholstery with a soft brush, and blot with a clean, damp cloth. Ensure the chair dries completely before use.
Can I use a steam cleaner on an ergonomic office chair?
Steam cleaning can work well on sturdy fabric upholstery, but use caution. Check the manufacturer’s label first. Avoid soaking the padding, as excess moisture can damage the foam or promote mold. Keep the steam nozzle moving and use the upholstery attachment. Do not use steam on leather, faux leather, or mesh chairs, as the heat can warp or damage these materials.
How often should I deep clean my office chair?
For a chair in daily use, do a quick vacuum and spot treatment monthly. A full deep clean, including disinfecting and conditioning the material, is recommended every three to six months. If you have just purchased a used chair, give it a thorough cleaning immediately. Regular maintenance keeps the chair looking professional and extends its mechanical life.
